Prerequisites
- Basic knowledge of Spring Boot and Maven
- Running Keycloak instance with access to the administration console
What is SSO?
SSO (single sign-on) allows users to authenticate with multiple applications by logging in only once with the same credentials.
What is Keycloak?
According to https://www.keycloak.org/about.html: “Keycloak is an open source Identity and Access Management solution aimed at modern applications and services. It makes it easy to secure applications and services with little to no code.“
The problem
Suppose you need to run a new, simple application with REST API and deploy it in an existing environment. The application should be protected from unauthorized access. The key assumption here is that the authorization server (Keycloak) is part of the existing infrastructure so there is no need to define a new one. Let’s define a few general requirements:
- REST API is available only for authenticated users with a specified role named user
- The authentication process is covered by Keycloak
- The authorization is performed by the Spring Boot application
Read also: Painless Changelog
The solution
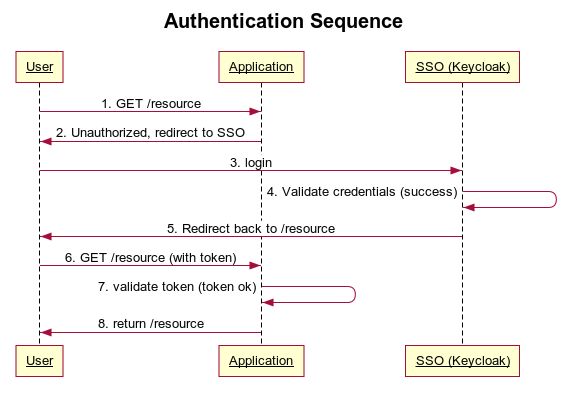
The final authentication/authorization flow should look like the picture below. Keycloak acts as an SSO. For clarification purposes only the happy path flow is covered.
Keycloak configuration
Process description:
- An unauthenticated user performs a GET request to /resource
- The application realizes that the user is unauthorized and redirects him to the SSO login form.
- The user provides credentials via the login form and sends it to SSO
- SSO checks the login and password provided
- If the login and password are correct, the user is redirected back to the originally requested /resource
- The authenticated user performs GET /resource again.
- The application checks if the authorized user is assigned to the required role
- The requested resource is sent back to the user
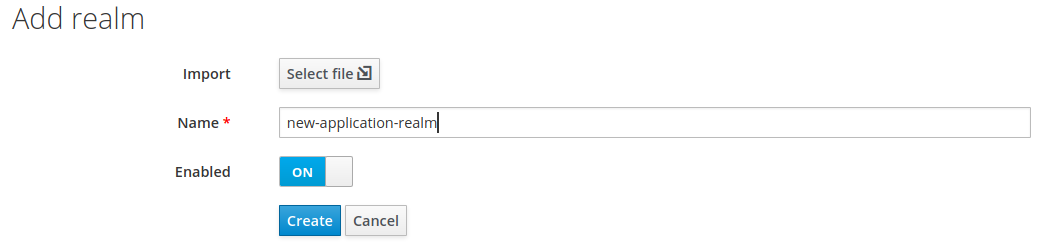
Keycloak configuration First we need to define a new realm (this step might be skipped if you want to reuse an existing one). From the “select realm” menu choose the “add realm” option, provide the name new-application-realm and hit the “create” button.
Next, create a client. Select “clients” from the sidebar menu and hit “create”.
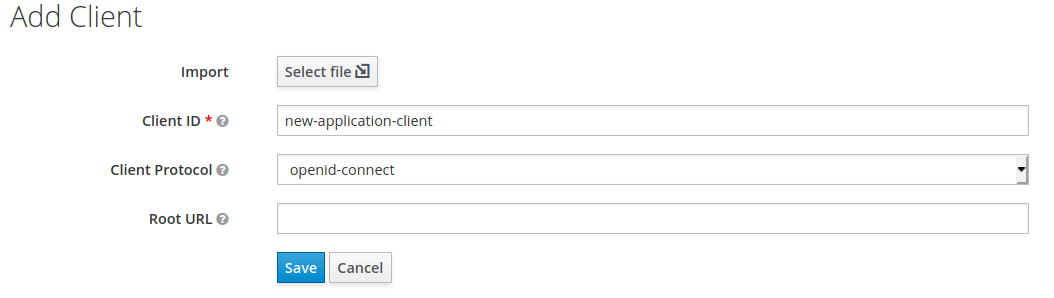
The only required field is “Client ID”. Type new-application-client and click “save”. Note that the name you entered will be referenced later in the Spring Boot application configuration. Now switch to the “settings” tab and type http://localhost:8088/* in “Valid Redirect URIs” and save the form. Note port 8088 which your Spring Boot application should be run on.

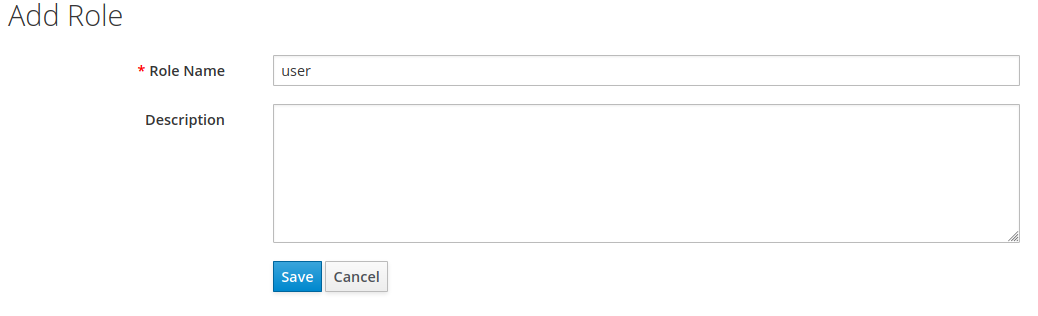
The next step is to create a role definition. Simply select “roles” from the sidebar and hit “add role”. In the form fill “role name” with the value “user” and press “save”.
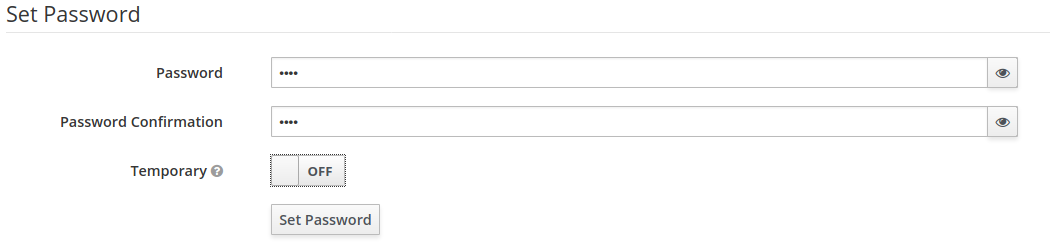
The final step is to create a new user in the previously defined role. From the side menu select “users” and click “add user”. Type the username “test” in the appropriate field and save the form. After that switch to “credentials”, provide the password, switch “temporary” to “off” and hit “set password”.
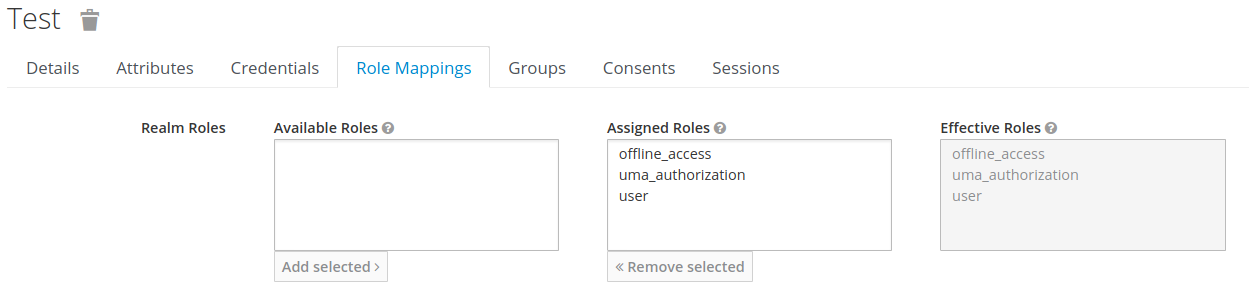
To assign a role, select the “role mappings” tab and move the “user” role from “available” to “assigned”.
After these few steps Keycloak is configured and ready for action! Now the second part – the application.
Read also: Benefits of immutability in a software development
Spring Boot application configuration
Now it’s time to configure the application. Assuming your configuration is Maven based, you need to add the code below to pom.xml:
    <dependencies>
              <dependency>
                     <groupId>org.springframework.boot</groupId>
                     <artifactId>spring-boot-starter-web</artifactId>
              </dependency>

              <dependency>
                     <groupId>org.keycloak</groupId>
                     <artifactId>keycloak-spring-boot-starter</artifactId>
              </dependency>
       </dependencies>

       <dependencyManagement>
              <dependencies>
                     <dependency>
                            <groupId>org.keycloak.bom</groupId>
                            <artifactId>keycloak-adapter-bom</artifactId>
                            <version>8.0.1</version>
                            <type>pom</type>
                            <scope>import</scope>
                     </dependency>
              </dependencies>
       </dependencyManagement>
What does it do? It simply adds Keycloak starter and security auto configuration for your Spring Boot application. All you need to configure is just a few lines as shown in the snippet below:
server.port=8088

keycloak.realm = new-application-realm
keycloak.auth-server-url = http://localhost:8080/auth
keycloak.resource = new-application-client
keycloak.public-client = true

# protect resource (role 'user' is required)
keycloak.securityConstraints[0].authRoles[0] = user
keycloak.securityConstraints[0].securityCollections[0].patterns[0] = /resource/*
Notice that the application is configured to be run on port 8088 (server.port). The second block of settings refers by name to Keycloak’s realm and client defined in the “Keycloak configuration” section. The last part simply allows access to /resource only for authenticated users in a “user” role. The last thing to do is to add some code that does real business stuff. In other words, a REST controller. Look at the snippet below:
@RestController
public class NewApplicationRest {

    @GetMapping(path="/resource")
    public String getResource(){
        return "protected resource";
    }

}
The only resource defined is /resource (yes, the resource that appeared in the previous configuration as secured). In case you face an exception with this message when running the application:
required a bean of type ‘org.keycloak.adapters.springboot.KeycloakSpringBootConfigResolver’ that could not be found.
The solution is to define the missing bean somewhere in your application:
@Bean
public KeycloakSpringBootConfigResolver keycloakConfigResolver() {
      return new KeycloakSpringBootConfigResolver();
}
Testing the application
First you must run the application. When it’s done, point your browser to http://localhost:8088/resource. Since you’re not authenticated, you will be redirected to Keycloak’s login form as shown in the picture below:
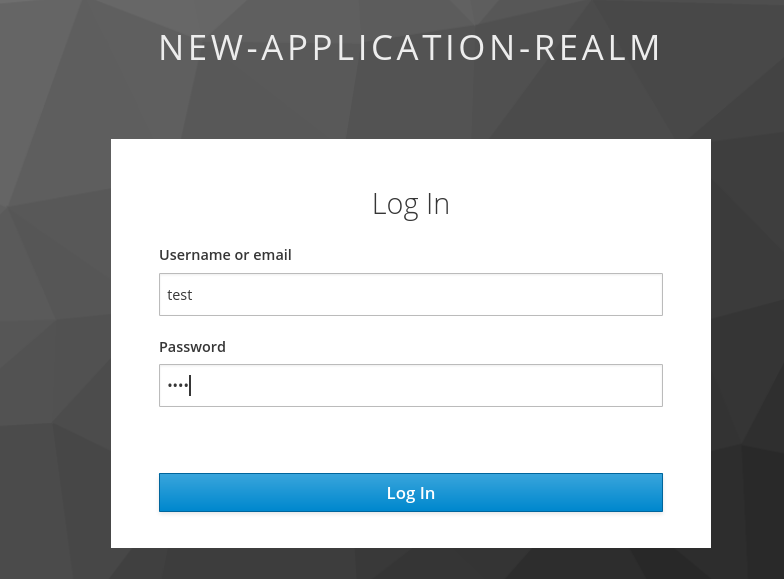
Type the credentials for the user you created at the beginning and click “log in”. You should be redirected back to your application as an authenticated user in a “user” role. Your browser should show something like this:

Congratulations! Now your REST API is protected from unauthorized access!
Read also: ISTQB certification for novices and experienced testers – is it worth it?